How to download the app Downloading on School Computers All employee computers and instructor computers in classrooms/labs will have Zoom installed automatically. NOTE: You do not need a Zoom account to join a meeting, an account is only required when hosting a meeting. Non-School Computers You can download the Zoom desktop […]
How to download the app
Downloading on School Computers
All employee computers and instructor computers in classrooms/labs will have Zoom installed automatically.
NOTE: You do not need a Zoom account to join a meeting, an account is only required when hosting a meeting.
Non-School Computers
You can download the Zoom desktop app direct from Zoom here.
You can also download the Zoom mobile app from either the Apple App Store or Google Play Store.
NOTE: You do not need a Zoom account to download or join a meeting, an account is only required when hosting a meeting.
Steps to record your Zoom meeting While hosting a meeting, click the Record button on the toolbar at the bottom (will be at the top if you are sharing your screen). Select either Record to the Cloud or Record to this Computer. Record to the Cloud will save to the […]
Steps to record your Zoom meeting
While hosting a meeting, click the Record button on the toolbar at the bottom (will be at the top if you are sharing your screen).
Select either Record to the Cloud or Record to this Computer.
Record to the Cloud will save to the shared VSC storage pool with limited space.
To access your recordings to view or download, login to your Zoom account at https://zoom.us/signin and click on Recordings on the left-side menu. Click on your recording and it will give you an option to download the file as video with audio or just audio alone.
Record to this Computer will save locally to the computer that you are running Zoom on.
After the meeting is over, Zoom will automatically convert the recording to MP4 format. By default, recordings are saved to your Documents folder then inside the Zoom folder.
We have more information about using Zoom in our Zoom App Overview page.
There are a few different ways to schedule recurring meetings: through the Zoom website or the Zoom app. Creating a Meeting using the Zoom Website To create a recurring meeting, login to your Zoom account at https://zoom.us/signin and then do the following: Click on Meetings on the left-side menu Click […]
There are a few different ways to schedule recurring meetings: through the Zoom website or the Zoom app.
Creating a Meeting using the Zoom Website
To create a recurring meeting, login to your Zoom account at https://zoom.us/signin and then do the following:
- Click on Meetings on the left-side menu
- Click the Schedule a New Meeting button
- Enter a name for the meeting in the Topic field
- Enter a description if you would like to
- Click the Recurring meeting checkbox underneath the Date and Time section
- Click the Recurrence drop-down menu and select No Fixed Time if you want this to be a permanent meeting to reuse or select one of the other options if it will be a daily, weekly, or monthly meeting at the date/time you want.
- Adjust the remaining settings as needed
- It is recommended that you choose Computer Audio instead of the default Both setting.
- When ready, click the Save button.
- After saving your meeting, the next page will provide the Meeting URL that you can share, it is in the format of: https://zoom.us/j/123456789
- NOTE: To get back to this page in the future, just go to the main My Meetings page on the left-side menu and click on your meeting to find the URL. You can also edit the meeting from here.
Creating a Meeting using the Zoom App
Open the Zoom app and sign in to your Zoom account.
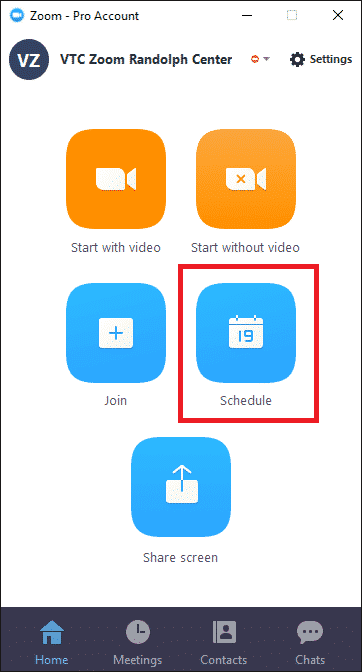
- On the Zoom app Home screen, click the Schedule button
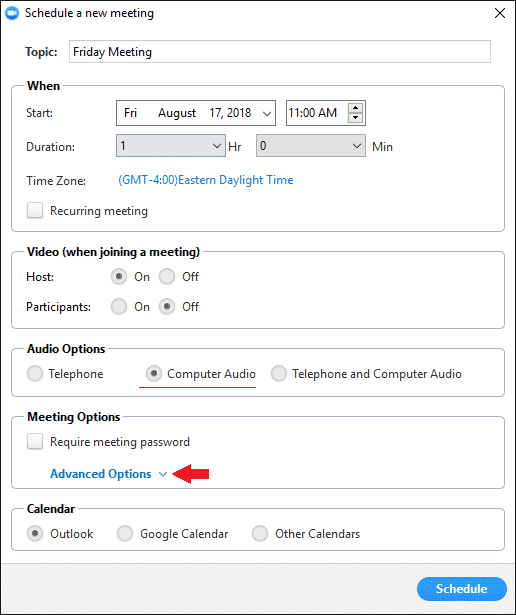
- In the Schedule a new meeting window, change the Topic field at the top if you would like a different name for your meeting
- Under the When section, click the Recurring meeting checkbox
- NOTE: When using the Zoom app to create recurring meetings, it will always create the meeting with No Fixed Time, if you want to create a recurring meeting that is daily, weekly or monthly at a specified date/time, you will need to use the Zoom website.
- Under Audio Options, change it to Computer Audio only
- If you do not see this option, look for VoIP Only instead
- Adjust any additional settings as needed. Some settings are hidden under Advanced Options under the Meeting Options at the bottom.
- When done, click the Schedule button.
- If you selected Outlook under the Calendar section and have Outlook installed/setup, an Outlook window will appear with all the Zoom meeting information including the Meeting URL to share with others.
- If you selected Other Calendars under the Calendar section, it will pop-up a window with invitation information including the Meeting URL to share with others.
There are a few different ways to schedule one-time use meetings: through the Zoom website or the Zoom app. Creating a Meeting using the Zoom Website Login to your Zoom account at https://zoom.us/signin and then do the following: Click on Meetings on the left-side menu Click the Schedule a New […]
There are a few different ways to schedule one-time use meetings: through the Zoom website or the Zoom app.
Creating a Meeting using the Zoom Website
Login to your Zoom account at https://zoom.us/signin and then do the following:
- Click on Meetings on the left-side menu
- Click the Schedule a New Meeting button
- Enter a name for the meeting in the Topic field
- Enter a description if you would like to
- Select the date and time of the meeting
- Adjust the remaining settings as needed
- It is recommended that you choose Computer Audio instead of the default Both setting.
- When ready, click the Save button.
- After saving your meeting, the next page will provide the Meeting URL that you can share, it is in the format of: https://zoom.us/j/123456789
- NOTE: To get back to this page in the future, just go to the main My Meetings page on the left-side menu and click on your meeting to find the URL. You can also edit the meeting from here.
Creating a Meeting using the Zoom app
Open the Zoom app and sign in to your Zoom account.
- On the Zoom app Home screen, click the Schedule button
- In the Schedule a new meeting window, change the Topic field at the top if you would like a different name for your meeting
- Adjust the date and time as needed
- Under Audio Options, change it to Computer Audio only
- If you do not see this option, look for VoIP Only instead
- Adjust any additional settings as needed. Some settings are hidden under Advanced Options under the Meeting Options at the bottom.
- When done, click the Schedule button.
- If you selected Outlook under the Calendar section and have Outlook installed/setup, an Outlook window will appear with all the Zoom meeting information including the Meeting URL to share with others.
- If you selected Other Calendars under the Calendar section, it will pop-up a window with invitation information including the Meeting URL to share with others.
Creating a Quick Meeting using the Zoom app
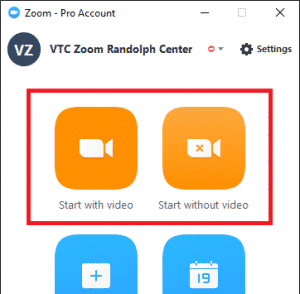
To quickly create a new one-time meeting, open the Zoom desktop app and login to your account. From the Zoom home screen, click the Start with video or Start without video button.
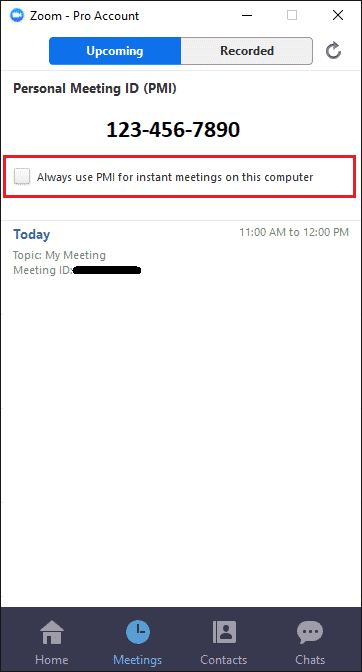
IMPORTANT: When starting a meeting through the Zoom app, by default you are assigned a random Meeting ID that you will need to share with the participants so they can join the meeting.
If you’d rather the Start with video button not use random Meeting ID’s every time and to always use your Personal Meeting ID associated with your Zoom account, click on the Meetings tab at the bottom of the Zoom app and then select Always use PMI for instant meetings on this computer.
Using Zoom for Video Conferencing Guides for Everyone Downloading the Zoom App Zoom App Overview Joining a Meeting Guides for Meeting Hosts Customizing your Profile Customizing Meeting Settings Creating One-Time Meetings Creating Recurring Meetings Starting your Meeting Recording a Meeting
Using Zoom for Video Conferencing
Guides for Everyone
Guides for Meeting Hosts
After you leave Vermont Tech, your account and access to services are subject to suspension if you no longer have an active relationship with the college. Everyone is encouraged to migrate to a non-VSC account for email, file storage, etc. The following are general guidelines and are not a contractual […]
After you leave Vermont Tech, your account and access to services are subject to suspension if you no longer have an active relationship with the college. Everyone is encouraged to migrate to a non-VSC account for email, file storage, etc.
The following are general guidelines and are not a contractual agreement. These guidelines are subject to change without notice.
Faculty/Staff (Retiree with benefits)
- Local network access will become inactive soon after retirement
- Basic access to email/calendar service will continue, uninterrupted
- Access to OneDrive file storage and Office 365 desktop/mobile apps will be removed soon after the end of contracts
- OnTheHub software licenses will expire at the end of their license term
Faculty/Staff (Non-retiree)
- All account access will be removed soon after the end of any college contracts
- OnTheHub software licenses will expire at the end of their license term
Students who graduate and become alumni
- Local network access will become inactive soon after graduation
- Basic access to email/calendar service will continue, uninterrupted
- Access to OneDrive file storage and Office 365 desktop/mobile apps will be removed one year after graduation
- OnTheHub software licenses will expire at the end of their license term
Students who withdraw or otherwise separate from the college without a degree
- Local network access will be removed during any inactive semester
- Accounts may be suspended during any semester when they are not an active student
- Accounts will be removed after one year of inactivity
- OnTheHub software licenses will expire at the end of their license term
Window snapping is where you place more than one program on one screen. To do this, click and hold the top of a program window. Drag the program to the top, bottom, left, or right of the screen. Once in the right position, a shadow of there the program will […]
Window snapping is where you place more than one program on one screen.
- To do this, click and hold the top of a program window.
- Drag the program to the top, bottom, left, or right of the screen.
- Once in the right position, a shadow of there the program will be will be outlined. If the program is only shadowing a quarter of the screen, drag the program down the edge further.
- Once the shadow is where you would like it to be, release the window and it will snap into place.
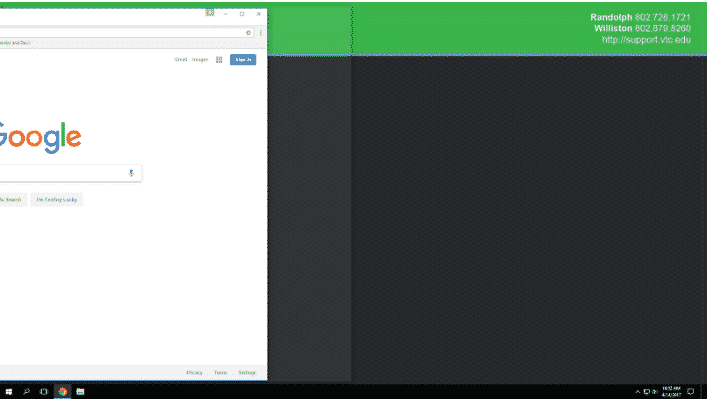
- To snap another window, follow the previous steps on the other side of the screen.
- NOTE: If you have other programs running, Windows may give suggestions to put on the other side of your screen. Click on a program you would like there and it will snap the window there for you.
Task View To open Task View, click on the symbol next to the magnifying glass at the bottom left of your screen. A window with all of your currently open programs will show up. From here you can switch between programs by clicking the open item. Virtual Desktops Windows […]
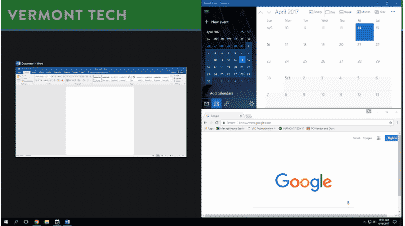
Task View
To open Task View, click on the symbol next to the magnifying glass at the bottom left of your screen.

A window with all of your currently open programs will show up.
From here you can switch between programs by clicking the open item.
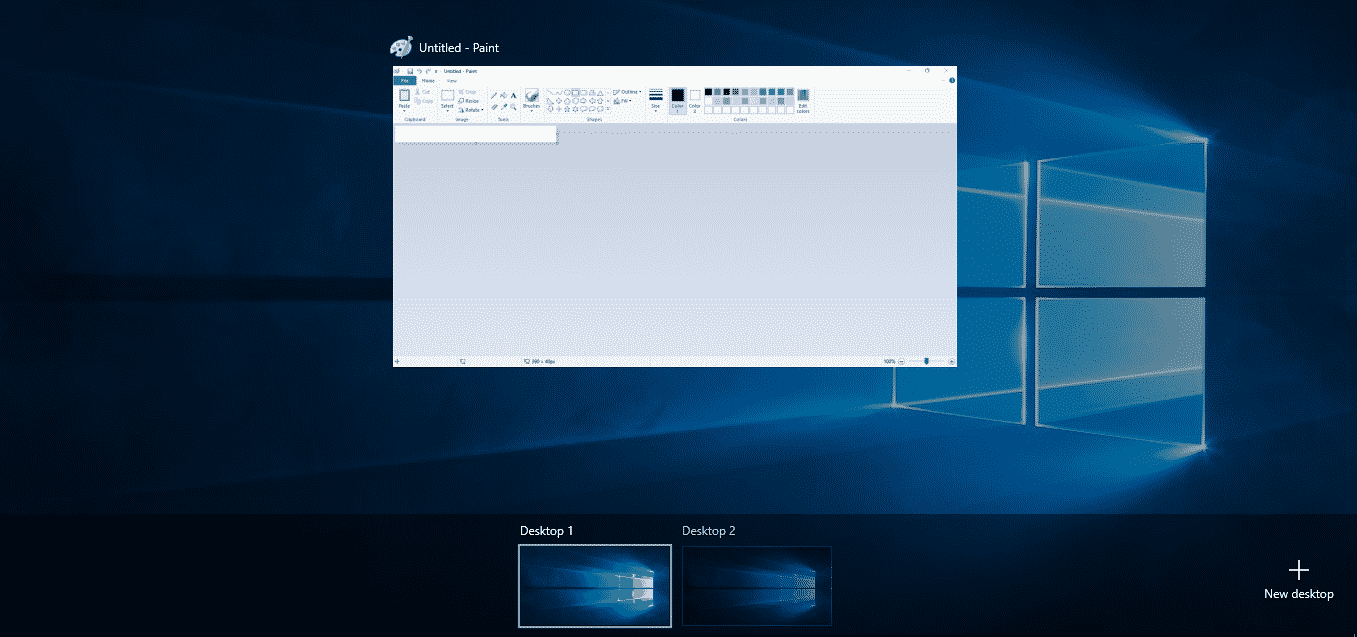
Virtual Desktops
Windows 10 allows users to easily make different desktops. This means that by clicking a button, you can now have a fresh desktop to open different apps or programs in that will not be mixed into the other desktop.
- First, go into Task View
- In the bottom right corner, click “New Desktop”
- A new desktop will appear at the bottom of your screen.

- To switch between desktops, click Task View again and select the desktop you would like to work with.
NOTE: If you are using a laptop, a three-finger swipe on the touch pad can be used to switch between open virtual desktops.
